What is Arduino UNO | A Step-by-Step Beginner's Guide Part - 1: Hardware Overview
Arduino UNO is a low-cost, flexible, and easy-to-use programmable microcontroller development board that can be integrated into a variety of electronic and robotic projects.

Moumita Kabir Ananna
Embedded System Engineer
PUBLISHED ONAug 08, 2022
Do you want to start your journey towards Robotics, IoT, or electronics?
Then the Arduino UNO is the most robust board you can start playing with. The UNO is the most used and easiest development board for beginners.
What is Arduino UNO
|
Arduino UNO is a low-cost, flexible, and easy-to-use programmable microcontroller development board that can be integrated into a variety of electronic and robotic projects. It has an AVR microcontroller ATmega328P along with the necessary system to program the microcontroller. |
What is an Arduino UNO used for
This board can interface with other Arduino boards, Arduino shields, Raspberry pi boards, and other microcontrollers. This board can control sensors, relays, LEDs, servos, motors, etc.
This board is mainly used for conducting experiments, learning, building projects by students, and prototyping.
Different Components of Arduino Uno Board:
An Arduino can be divided into several parts. They are as follows:

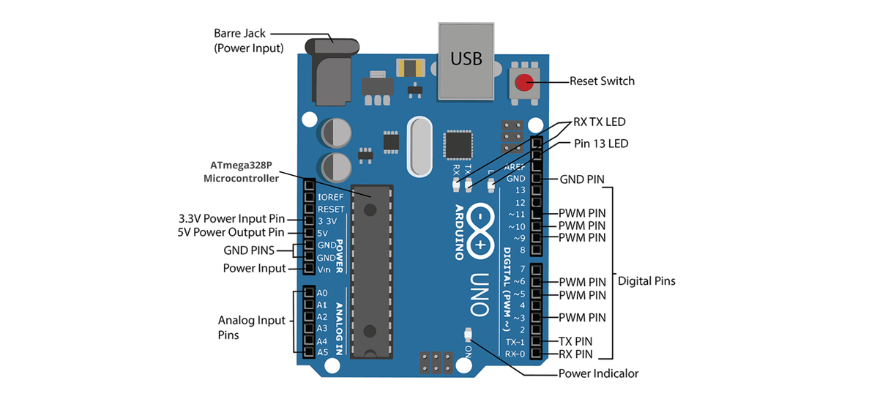
USB connector:
With the USB A to B connector, the Arduino is connected to the computer's USB port through a USB cable. The Arduino can then be programmed. Once the program or Sketch is uploaded from the computer to the Arduino, the Arduino board can be powered by the other power sources like DC adaptor, battery, etc.
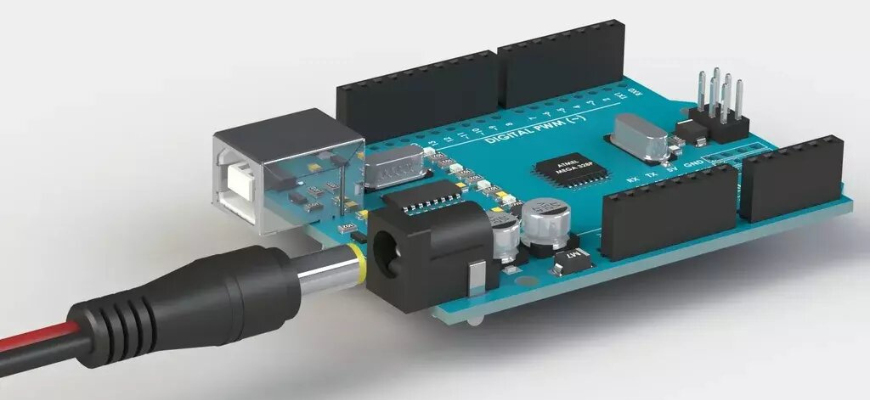
Power Jack:
You can also power your Arduino with this jack when it is not plugged into a USB port for power. You can use a power source between 7-12V.

ATmega328P Microcontroller:
This part is the brain of your board. All the work that is done by Arduino UNO is through programming this microcontroller mounted on the board. The ATmega328 is a single-chip microcontroller. It has a modified Harvard architecture 8-bit RISC processor core.

Arduino Pinouts:
Analog Pins:
ATmega328P has 6 ADC pins. That is why the number of analog pins in Arduino Uno is 6, i.e. A0 to A5. The values of various analog sensors are read through these pins. For example, if you want to read the value of an analog temperature sensor or gas sensor, connect the output pin to any pin between A0 to A5 and program the Arduino as required.

Digital Pins:
These are mainly the input/output pins of the Arduino board. Arduino Uno has 14 digital pins i.e. 0 to 13. These pins can be driven high (5V) or low (0V) as desired. They can be configured as input or output pins.
Share


